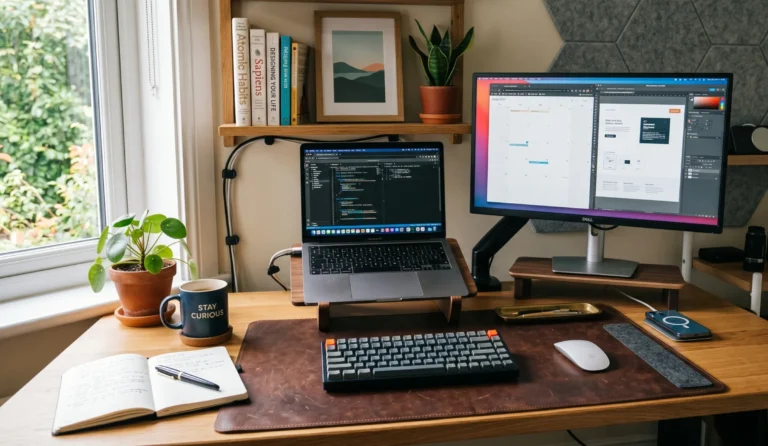
Ergonomic Monitor Arm Setup Guide: Position Your Screen for Comfort
If your neck aches by noon or your eyes feel like sandpaper by 3 pm, there is a very good chance your monitor is not positioned the way your body needs it to be. A quality ergonomic monitor arm — paired with five minutes of proper adjustment — fixes more discomfort than a new chair, a standing desk, or any amount of blue-light glasses ever will.
This guide covers the ergonomic science behind correct monitor positioning, walks you through setup step by step, and recommends the specific arms Mr. Hippo has vetted for single-screen, dual, ultrawide, and heavy-duty setups — from budget gas-spring options to professional-grade choices built to last a decade.
Why your monitor position matters more than you think
Most monitors arrive on a fixed stand designed to fit the average person — but average rarely means you. Even a screen that sits two inches too low forces your head into a constant forward tilt. Researchers have documented that each inch of forward head posture adds roughly ten pounds of effective load to the cervical spine, compounding across an eight-hour workday into real structural strain.
Poor screen placement is one of the leading contributors to what clinicians call “tech neck” — chronic neck and upper back discomfort among office workers. The consequences include disc stress in the lower neck, facet joint irritation, shoulder muscle fatigue, and persistent tension headaches.
An adjustable monitor arm solves the root problem rather than masking the symptom. Instead of adapting your body to a fixed screen position, you configure the screen to match your body. That shift — small in hardware terms, large in ergonomic effect — is why a monitor arm delivers more comfort per dollar than almost any other desk upgrade.
What a proper ergonomic desk setup actually gives you
Correct ergonomic monitor positioning: the five dimensions
Proper monitor position ergonomics involves five distinct adjustable dimensions. Most people only tune one or two of these, which is why discomfort persists even after buying a quality arm. All five work together.
The five positioning dimensions — quick reference
- 1 · Height The top of the monitor bezel should sit at or just below your eye level when you’re seated upright with your back supported. Your natural resting gaze — roughly 15–20 degrees below horizontal — should land about one-third down from the top of the screen. Touch-typists can raise it slightly; people who frequently look at the keyboard should lower it.
- 2 · Distance Position the screen between 50 and 70 cm (20–28 inches) from your eyes. A practical test: sit upright and extend one arm fully forward — your fingertips should just reach or barely touch the screen. For 34-inch ultrawides, 24–30 inches is the optimal range due to the wider field of view.
- 3 · Tilt Tilt the top of the screen backward by 10–20 degrees. This aligns the display surface more perpendicular to your line of sight, reduces glare from overhead lighting, and relieves the muscle tension caused by looking straight ahead at a flat vertical screen. IMU studies suggest alternating between 10° and 20° every two hours helps prevent joint rigidity in the cervical spine.
- 4 · Lateral position The screen must be centered directly in front of you — no rotation of the neck. Even a few degrees of constant lateral deviation causes cumulative muscle fatigue. On dual-monitor setups, place the primary screen at center and angle the secondary screen only slightly toward your dominant eye.
- 5 · Glare & Brightness Position the desk at a right angle to windows, never facing or with a window directly behind the screen. Adjust screen brightness to match ambient room lighting — the display should look as bright as the wall behind it, not brighter. Anti-glare filters are a last resort; arm articulation is the first solution.
Special cases worth knowing
Progressive and bifocal lens wearers need to position the monitor 5–10 cm lower than standard recommendations and tilt it upward 15–30° so that the correct lens zone aligns with the screen. Standard eye-level positioning forces uncomfortable neck extension in this group.
Sit-stand desk users require a monitor arm with at least 17 inches of height travel — ideally a gas-spring model — because standing eye height differs significantly from seated eye height. Fixed stands make it physically impossible to maintain the correct ergonomic monitor position when transitioning between postures.
Dual monitor neck pain is almost always caused by an improperly placed secondary screen that forces a head rotation or creates an unequal focus distance. If your second monitor is more than 35–40 degrees off-center, it is positioned incorrectly for sustained use.
How to set up a monitor arm, step by step
Follow this sequence. Each step depends on the one before it — adjusting height before you’ve fixed your chair posture means you will calibrate to the wrong baseline.
Set your chair first
Adjust your chair so your feet are flat on the floor, knees at roughly 90 degrees, and your lower back is supported. Forearms should be approximately parallel to the desk surface, elbows at 90–110 degrees. The monitor arm adapts to you, not the other way around — establish this baseline before touching the arm.
Verify VESA compatibility and monitor weight
Look at the back of your monitor for a grid of four screw holes. Measure the hole pattern — most monitors use 75×75 mm or 100×100 mm. Write down the monitor’s net weight without the stand (found in the manual or manufacturer’s website). Your arm must support that weight within its rated range.
Mount the arm to your desk
Clamp the arm to a flat, solid edge of your desk. Grommet mounts are more stable on thin desks. For MDF or particleboard desks, place a small steel plate or hardwood block between the clamp and the surface to distribute load and prevent compression over time. Glass desks require a freestanding base.
Attach the monitor and set height
Remove the original stand from your monitor (usually one or two screws on the back neck joint). Attach the VESA plate, mount the monitor, and raise or lower the arm until the top of the screen sits at your eye level as established in Step 01. Gas-spring arms move with a light push; spring-tension arms need a hex key to loosen before adjusting.
Set viewing distance
Extend or retract the arm horizontally until the screen is one arm’s length away — 50–70 cm for most monitors, slightly further for 34-inch ultrawides. Sit fully back in your chair when doing this check, not leaning forward.
Dial in tilt, pan, and rotation
Tilt the screen backward 10–20 degrees. Confirm the screen is perfectly centered in your forward gaze with zero neck rotation. If you use the monitor in portrait mode for coding or reading, rotate it now and confirm the height still works correctly in both orientations.
Tune the gas-spring tension
Use the included hex key to adjust spring tension so the arm holds any position without drifting upward or drooping down. This usually takes 30–60 seconds and makes a dramatic difference in day-to-day usability. Under-tensioned arms droop; over-tensioned arms spring up when you let go.
Route your cables
Thread display and power cables through the arm’s built-in management channels. Use velcro ties (not zip ties — you will need to adjust later) to secure cables at each joint. Leave a small service loop of slack at each pivot point so the cables don’t go taut when you reposition the arm. Route remaining cables to the underside of the desk.
The best ergonomic monitor arms Mr. Hippo recommends
These are the arms Mr. Hippo keeps coming back to — tested against real desk setups, real monitors, and real daily use. Every pick has a clear reason it beats its alternatives at its job.
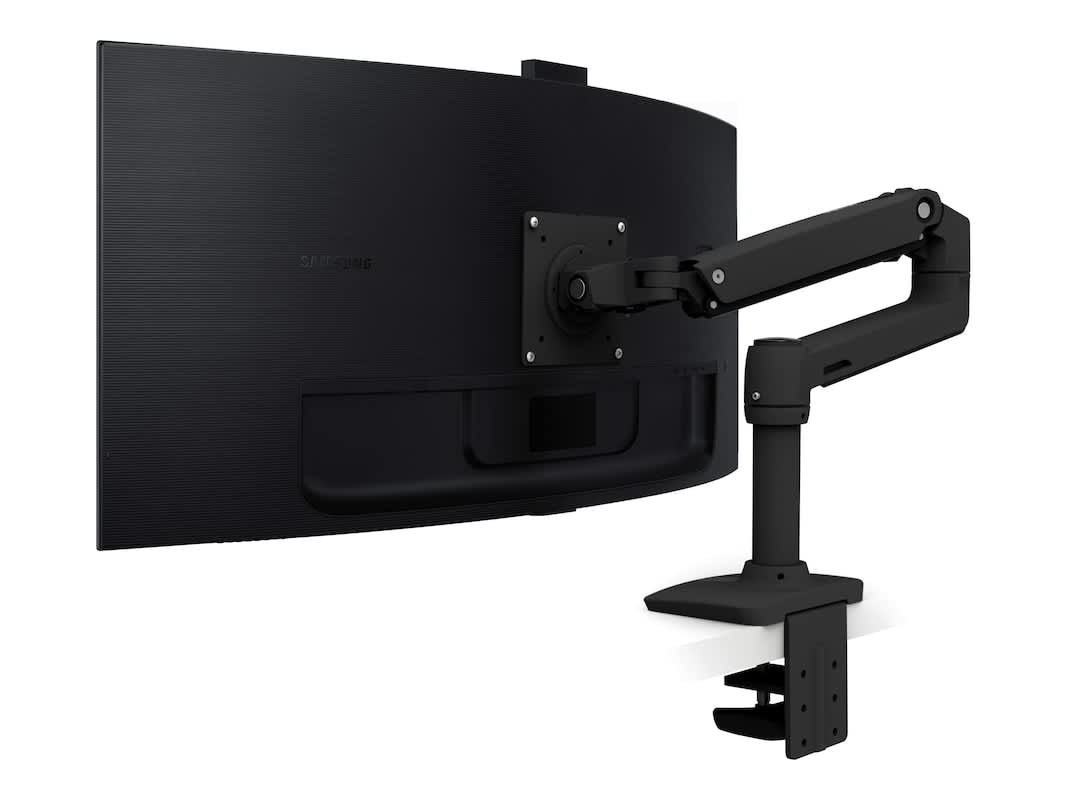
The LX Pro is the single best all-around ergonomic monitor arm for the vast majority of home office and work-from-home setups. It handles virtually every standard monitor — from a compact 24-inch IPS panel to a heavy 34-inch flat or curved ultrawide — with effortless gas-spring motion, zero daily maintenance, and a build quality that genuinely lasts a decade. If you only own one monitor and want the problem solved properly, this is the arm.
Pros
- True gas-spring holds any position without drift
- Supports flat, curved, and ultrawide up to 34″
- Both clamp and grommet hardware included
- Exceptional build quality — load-tested to 4× capacity
- Clean cable routing channels built in
- 10-year Ergotron warranty
Cons
- Premium price vs. budget alternatives
- 22-lb cap means it won’t work for heavier ultrawides
- Matte Black finish only (no silver version)
Mr. Hippo’s note: This is the arm on Mr. Hippo’s own desk. The LX Pro replaced a budget spring-tension arm that had been re-tightened so many times the hex bolt was practically worn smooth. Within a week, repositioning the monitor became a one-hand, two-second action. That smoothness has held up for over a year without adjustment. At this price point, the value over time is genuinely exceptional.
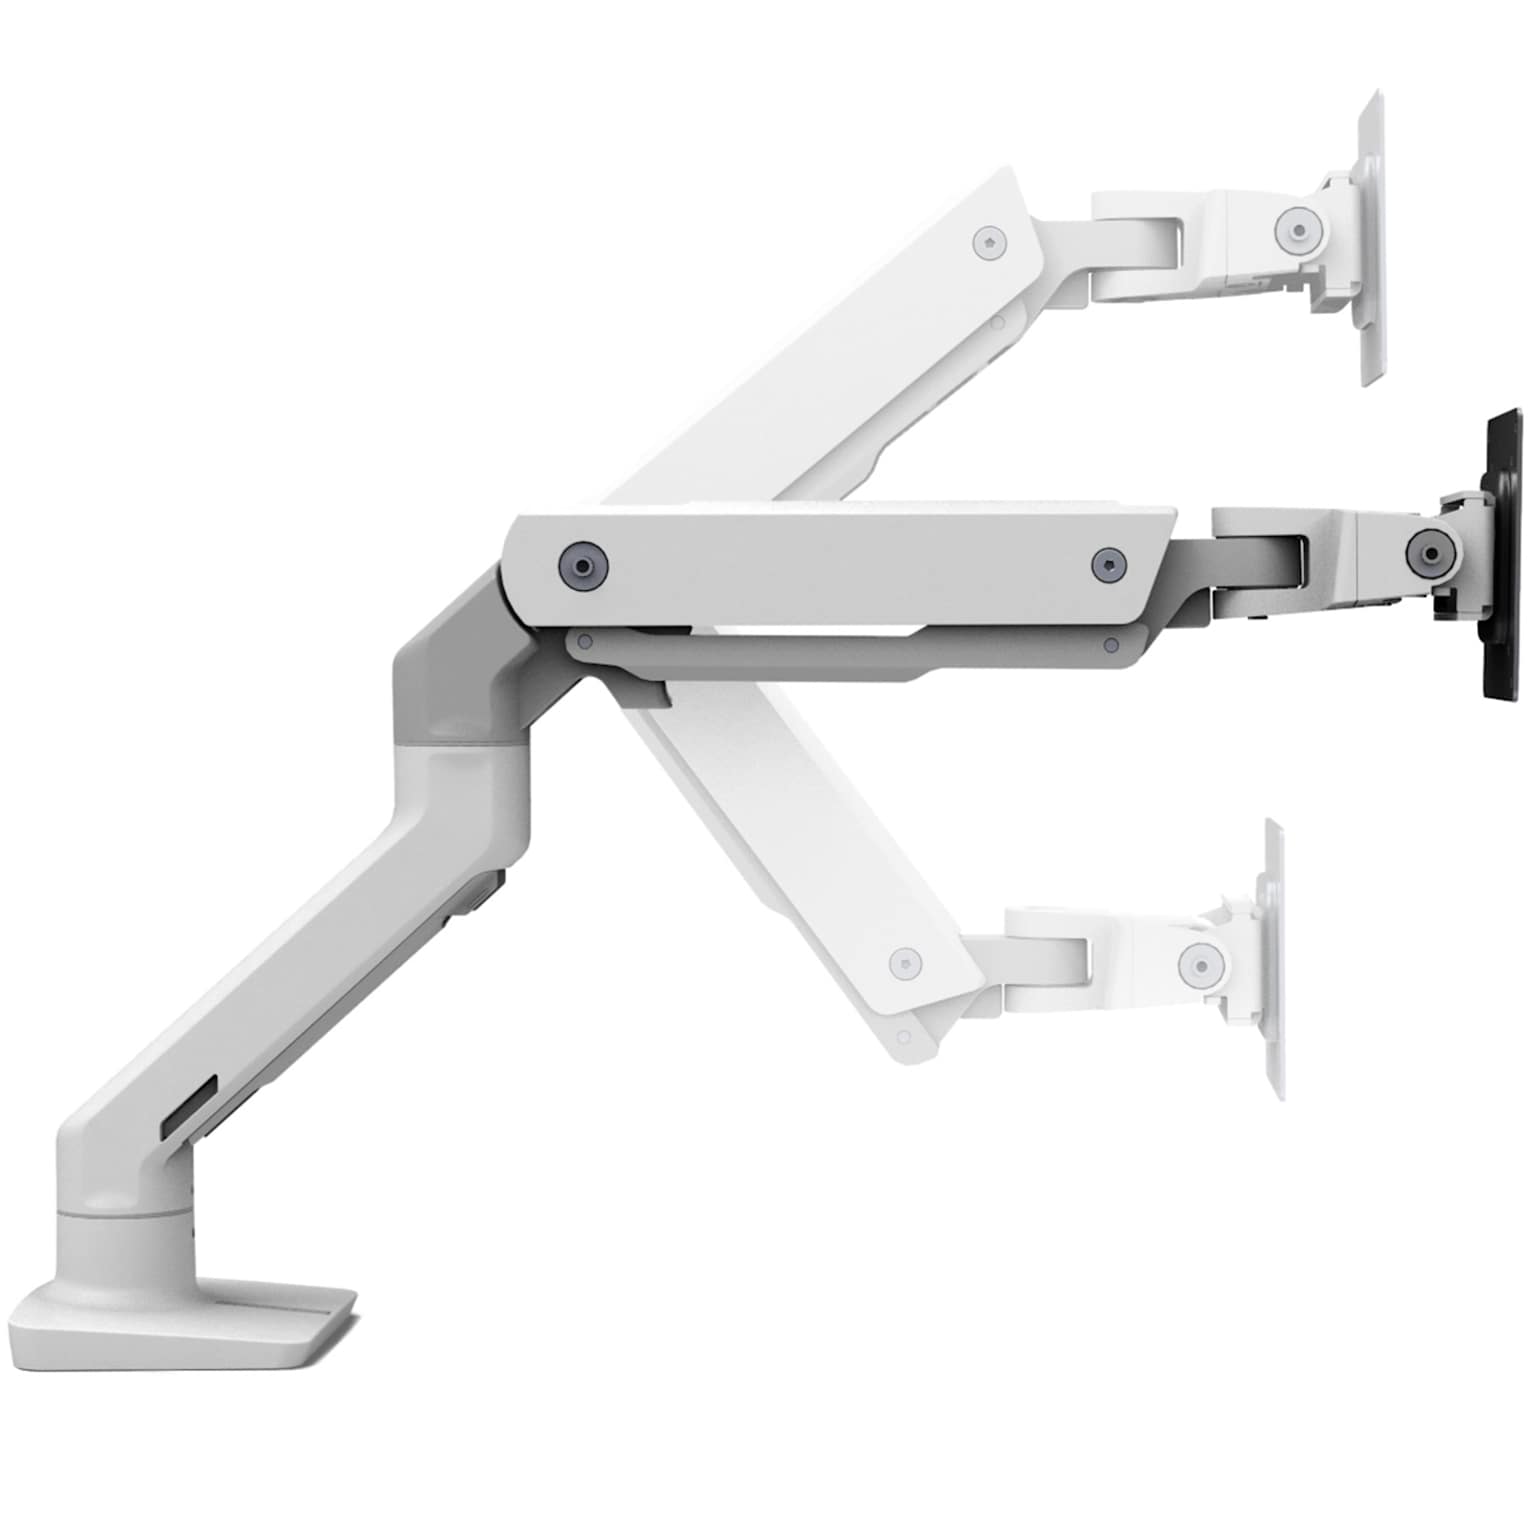
The Ergotron HX is the correct answer whenever a monitor exceeds what the standard LX Pro can safely handle — which means any ultrawide above 22 lbs, any 1000R curved gaming display, or anything 38 inches and above. It was explicitly engineered for the generation of massive curved panels and holds them with the same zero-drift gas-spring precision as its smaller siblings. The white finish makes it a rare and genuinely good-looking choice for light-colored desk setups.
Pros
- Handles monitors up to 42 lbs without drift
- Engineered specifically for 1000R curved ultrawides
- HD pivot for portrait mode on large panels
- Same Ergotron gas-spring precision as the LX line
- Premium white finish — genuinely rare in this category
- 10-year warranty
Cons
- Overkill for standard monitors under 22 lbs
- Higher price — justified only for truly heavy panels
- Larger clamp footprint than the LX Pro
Mr. Hippo’s note: This arm solves a real problem that most monitor arms simply cannot. If you own a 34″ or larger curved ultrawide and it droops or drifts on whatever arm you have now, the HX is the correct fix — not a band-aid of tightening the friction knob. The weight range starts at 28 lbs, so confirm your monitor’s net weight before ordering; monitors lighter than that need the LX Pro instead.
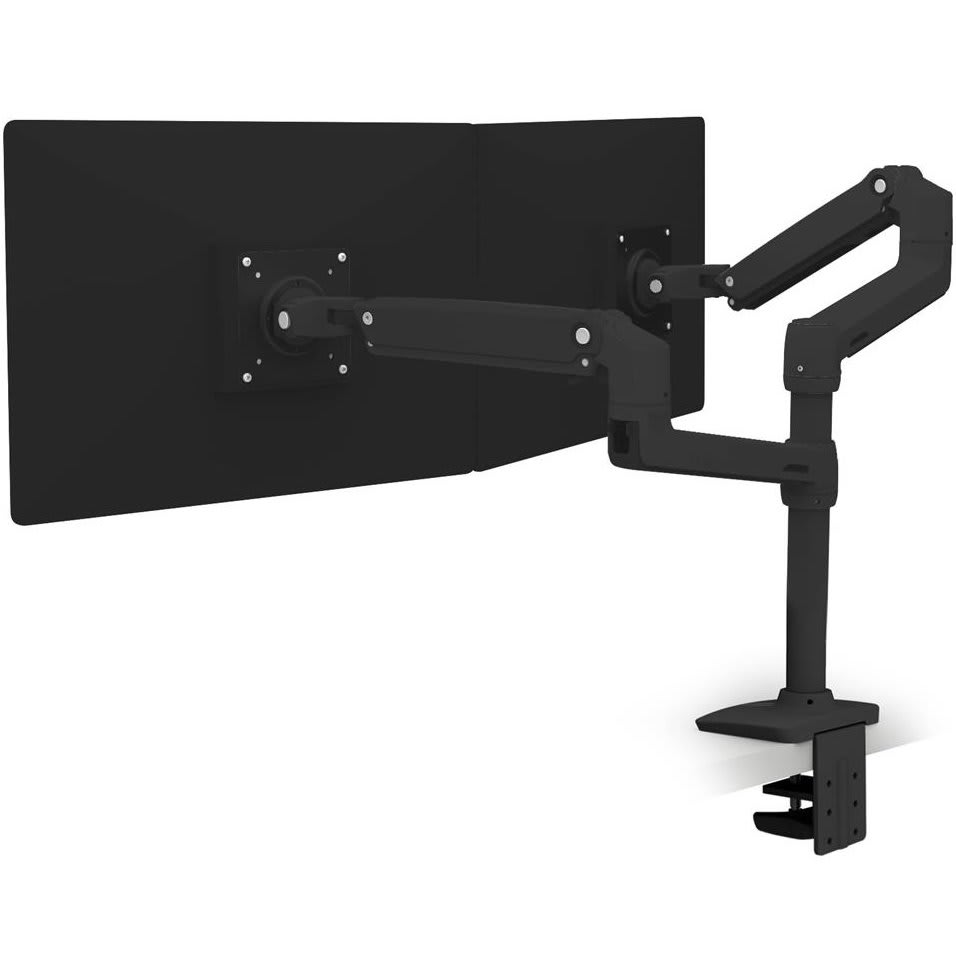
The LX Vertical Stacking Arm is Ergotron’s answer to the two-monitor problem: a tall-pole gas-spring arm that positions both screens on a single post, one above the other, with independent height and tilt adjustment for each panel. It reclaims every square inch of desk space the two original stands were occupying, while giving each screen the precise ergonomic monitor position it needs. It is particularly well-suited for sit-stand desks, where the tall pole provides enough vertical range to accommodate both seated and standing eye levels simultaneously.
Pros
- Stacked layout saves full desk-width footprint
- Independent gas-spring adjustment per screen
- Tall pole accommodates sit-stand desk transitions
- Handles monitors up to 40″ per arm
- Both clamp and grommet mounting hardware
- Ergotron 10-year warranty
Cons
- Stacked layout less ideal if you use both screens equally
- Requires a stable desk edge to anchor the tall pole safely
- Higher price than single-arm options
Mr. Hippo’s note: The stacked configuration is underrated. Side-by-side dual setups always require at least some lateral neck movement; stacking the secondary screen above the primary means both screens sit in your central forward view. If your secondary monitor handles reference material, dashboards, or communication tools you glance at rather than stare at, vertical is almost always more ergonomically sound than horizontal.
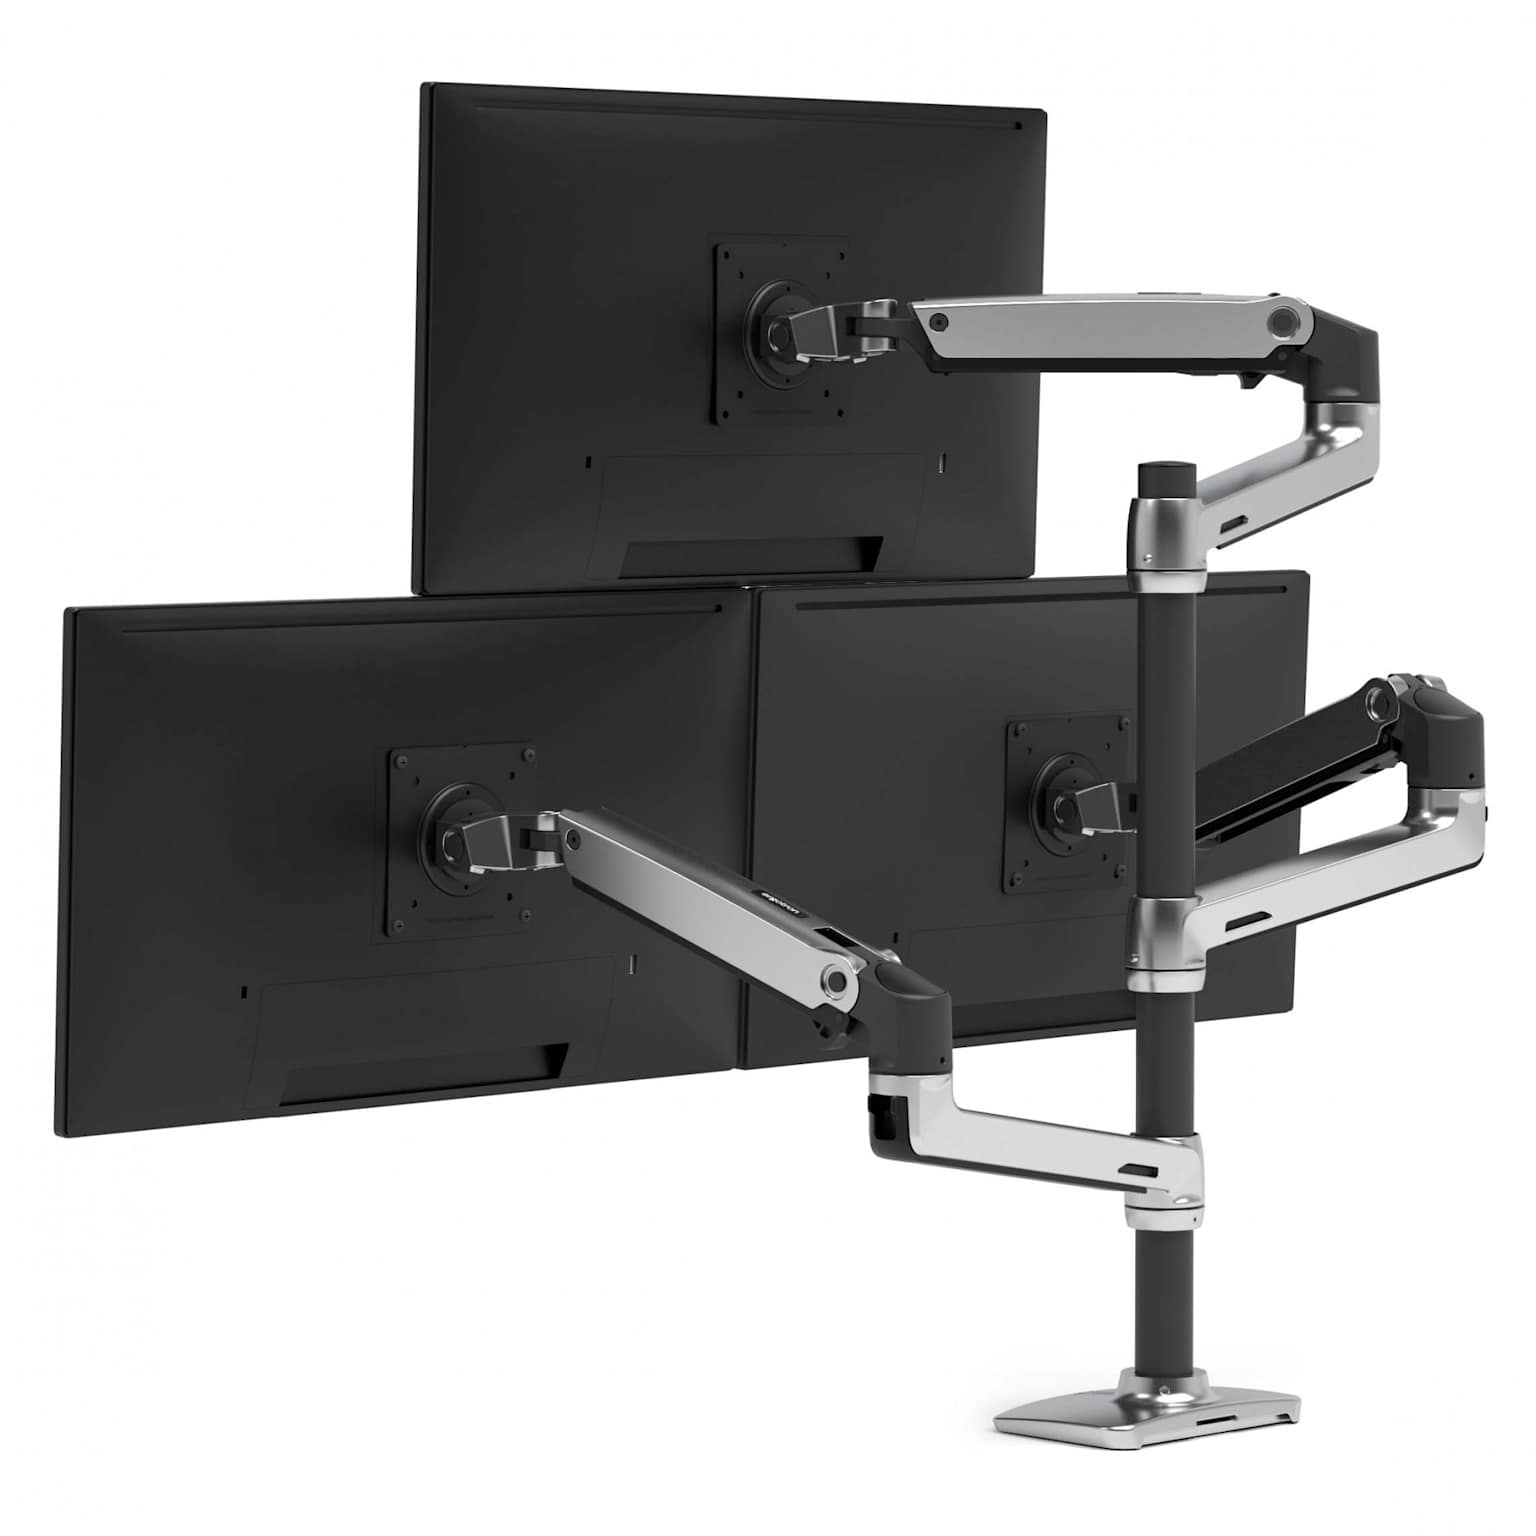
For triple monitor setups and multi-screen workstations that need independent, per-screen articulation, Ergotron’s broader Amazon storefront offers the full range of their professional mounting solutions — including triple arms, side-by-side dual configurations, and extended pole systems for three or more displays. The same gas-spring precision and 10-year warranty standard applies across the range.
Pros
- Full multi-monitor range from a single trusted brand
- Gas-spring precision across triple configurations
- Independent per-screen tilt, height, and rotation
- Professional grade — used in broadcast & trading desks
- 10-year warranty across all configurations
Cons
- Premium pricing at the triple-arm tier
- Requires a sturdy desk — light folding desks won’t work
Mr. Hippo’s note: Triple monitor setups have unique ergonomic requirements — the center screen must sit directly in front of you, and the side screens need to be angled 50–60 degrees inward so your peripheral field handles them naturally rather than forcing head rotation. Whatever configuration you choose from Ergotron’s range, the per-arm gas-spring adjustment makes dialing in that geometry straightforward. Match identical or very similar monitor sizes and resolutions to avoid the visual recalibration cost of mismatched panels.
Quick comparison
| Arm | Best For | Weight Range | Max Screen | Mechanism | Screens |
|---|---|---|---|---|---|
| Ergotron LX Pro Top Pick | Most single-monitor setups | 4–22 lbs | 34″ | Gas Spring | 1 |
| Ergotron HX | Heavy ultrawides 28–42 lbs | 28–42 lbs | 49″ | Gas Spring (HD) | 1 |
| Ergotron LX Dual Stacking | Vertical two-monitor stacks | 7–22 lbs each | 40″ per arm | Gas Spring | 2 |
| Ergotron Multi Collection | Triple & multi-screen setups | Varies by model | Varies | Gas Spring | 3+ |
What to check before you buy
Monitor arms fail at one of five checkpoints. Every purchase should confirm all five — in this order — before any other feature matters.
1 · VESA pattern match
Look at the back of your monitor for a grid of four screw holes. Measure the distance between them — most panels use 75×75 or 100×100 mm. Some larger ultrawides use 200×100 mm. This must match the arm’s VESA plate exactly. If your monitor has no VESA holes, it is likely not mountable without an adapter.
2 · Weight — with margin
Find your monitor’s net weight without the stand. Choose an arm rated for at least 20–30% above that figure. A 16-lb ultrawide needs an arm rated for 20+ lbs. This margin protects against lever-arm torque on extended arms and ensures the gas spring stays calibrated as it ages.
3 · Gas spring vs. friction
Gas-spring arms use compressed nitrogen to hold any position indefinitely. Friction/spring-tension arms use a mechanical coil that fatigues over 6–12 months and requires periodic re-tightening. For daily use, gas spring is categorically better and worth the premium. Friction arms make sense only for ultra-budget setups used occasionally.
4 · Screen size range
Weight capacity and screen size are separate specifications. An arm rated for 20 lbs may only be designed for screens up to 27 or 32 inches. A wider screen creates more lever-arm torque even at the same weight. Confirm both the weight limit and the declared screen size range for your specific panel.
5 · Desk edge clearance
Clamp mounts require a flat desk edge and typically fit 10–60 mm thickness. MDF and particleboard compress under sustained clamp pressure — use a reinforcement plate. Glass desks need a freestanding base. Grommet mounts (through a hole) offer better stability for thin or soft-surface desks.
6 · Height travel range
If you use a sit-stand desk, confirm the arm offers at least 17 inches of vertical travel. The difference between seated and standing eye level for most people is 10–14 inches, and you need headroom above that. Standard arms with 8–10 inches of travel lock you into one posture effectively defeating the purpose of a height-adjustable desk.
Single arm vs. dual arm: which is right?
For two monitors used equally — such as extended desktop for trading, development, or video production — two separate single arms give more per-screen adjustment flexibility than a shared dual arm. Each screen can be at a different height and distance. For setups where one screen is primary and the other is reference-only, a dual arm (especially a vertical stacking configuration) is cleaner, uses one clamp point, and costs less than two premium single arms.
Ultrawide monitor arm considerations
A 34-inch ultrawide panel is physically wider than a same-diagonal 16:9 screen, creating substantially more torque on the arm. The LX Pro handles most 34-inch ultrawides under 22 lbs comfortably. For 34-inch panels above 22 lbs — which includes most premium VA and IPS ultrawides — the Ergotron HX is the appropriate choice. Attempting to use a standard arm on a monitor above its weight rating causes slow positional drift that feels like a loose arm but is actually an overloaded gas spring.
Wrist rests, monitor risers, and what actually helps
Wrist rests — useful when used correctly
Wrist rests have a reputation for either being essential or completely useless, depending on who you ask. The truth is more specific: they help only when used as designed. The most common mistake is resting the wrists on the pad while actively typing. Wrist rests are for pauses in typing — the moment your fingers lift from the keys. During active keystrokes, your wrists should float slightly above the rest with your forearms doing the movement work.
When shopping, look for a rest that is no taller than the home row of your keyboard, at least 1.5 inches deep, and made from soft, rounded material (gel or memory foam) rather than hard plastic. The minimum recommended depth from CCOHS is 38 mm. For mouse wrist rests: the rest should be no taller than the peak of the mouse, and contact should occur at the base of the palm, not the wrist joint itself.
Monitor risers — when they help and when they don’t
A monitor riser is a passive platform that raises a screen on its original stand — simpler and cheaper than a full arm, but without tilt, swivel, or horizontal control. Risers are appropriate when you have a single monitor, your seated eye height puts the screen only 5–15 cm below the correct position, and your desk is unsuitable for a clamp mount.
They are not appropriate for sit-stand desks (height is fixed), multiple monitors of different sizes (creates height mismatches), or body proportions significantly above or below average. To calculate the right riser height: measure your seated eye height from the floor, measure the current height of the monitor’s top edge, subtract, then subtract another 5–7 cm to bring the top edge to eye level. If the required lift exceeds 15 cm, a monitor arm is the correct solution.
Reducing eye strain and neck pain for good
Proper physical positioning solves the structural problem — but sustained screen work has additional demands on the eyes and broader musculature that physical setup alone cannot address. These habits work alongside a correct ergonomic monitor arm setup, not instead of it.
The 20-20-20 rule
Every 20 minutes, look at something at least 20 feet away for 20 seconds. This one habit, consistently applied, eliminates a significant fraction of the ciliary muscle fatigue that causes digital eye strain — the specific type of eye discomfort caused by sustained near-focus work. The American Optometric Association endorses this as the single most impactful behavioral change for computer eye strain prevention. Set a phone timer or use a free desktop reminder app — do not rely on memory.
Screen brightness and contrast
The most commonly overlooked cause of computer eye strain is a screen that is significantly brighter than the ambient environment. Your display should look roughly as bright as the wall behind it — not the default factory brightness, which is calibrated for a brightly lit retail store. Reduce brightness in dim or evening conditions. Enable night/warm color temperature mode after sunset to reduce blue light output. Set text at approximately three times the minimum readable size for comfortable extended reading.
Blink and move
Screen use reduces blink rate from a normal 15–20 times per minute to as low as 5–7 times per minute. Consciously remind yourself to blink during prolonged focus work. More practically: take a proper micro-break — stand, walk to another room, get water — every 20–30 minutes. This matters more for spinal health than almost any piece of ergonomic hardware. A correctly configured ergonomic desk setup combined with regular movement reduces accumulated disc pressure more effectively than a perfect setup with unbroken six-hour sitting sessions.
Computer monitor settings to reduce eye strain
Beyond brightness: enable high-contrast text settings (black on white remains the easiest combination for the visual cortex to process), reduce screen refresh rate flicker by confirming your monitor is set to 60 Hz or higher, and verify your prescription lenses (if applicable) are optimized for computer working distance — the standard prescription distance test of 20 feet differs significantly from a typical 50–70 cm screen distance.
Monitor arm terminology explained
- VESA Mount Standard
- The Video Electronics Standards Association (VESA) defined the four-screw hole pattern on the back of monitors that allows them to attach to standardized mounts. Common patterns are 75×75 mm and 100×100 mm for standard monitors; larger patterns appear on heavier commercial displays. Always verify your monitor’s specific VESA pattern before purchasing any arm.
- Gas Spring (Pneumatic Spring)
- A pressurized nitrogen cylinder used inside premium monitor arms to counterbalance the monitor’s weight. Gas springs hold any position without drift, require no periodic adjustment, and provide smooth, effortless repositioning. They are the most reliable mechanism for daily ergonomic monitor position changes and are the default choice on Ergotron’s LX and HX lines.
- Spring-Tension (Friction) Arm
- A mechanical spring coil that provides resistance to hold the arm in position. Unlike gas springs, friction arms fatigue over 6–12 months and require periodic re-tightening with a hex key. Suitable for infrequent repositioning; not recommended for sit-stand desk workflows or daily height changes.
- Clamp vs. Grommet Mount
- A clamp mount attaches to the edge of a desk without requiring any modification to the desk surface — the most common configuration. A grommet mount passes through a hole in the desk and is more stable, particularly for heavier monitors or thin desk surfaces. Most Ergotron arms include hardware for both.
- Tilt, Pan, Rotation
- Three independent adjustment axes on a monitor arm. Tilt moves the screen face up or down (backward tilt of 10–20° is ergonomically recommended). Pan rotates the screen left or right on a horizontal axis. Rotation (or pivot) turns the screen from landscape (horizontal) to portrait (vertical) orientation — useful for document work, coding, or narrow secondary screens.
- Height Travel
- The total vertical range the arm can move the monitor — from its lowest to its highest position. Standard arms offer 8–13 inches of travel, which is sufficient for most seated setups. Sit-stand desk users need at least 17 inches of travel to accommodate the full range of seated and standing eye-level positions.
- Cervical Spine / Tech Neck
- The cervical spine comprises the seven vertebrae in the neck. “Tech neck” is a colloquial term for the chronic neck discomfort caused by sustained forward head posture during screen use. Each inch of forward head tilt adds approximately 10 lbs of effective load to the cervical spine — a 2-inch forward tilt during an eight-hour workday is equivalent to carrying an extra 20 lbs on the neck throughout that period. Correct monitor height eliminates most of this load.