Workspace Ideas
Smart Clean Desk Setup Ideas for a Calm Workspace
A clean desk setup is not about stripping away every object or making your home office look like a showroom. It means keeping essential tools easy to reach, giving everything else a clear home, and removing small obstacles that make work harder to begin.
The best setup is comfortable, functional, and realistic to maintain. Start with your layout and habits, then add storage or accessories only when they solve a specific problem.
The Starting Point
What a Clean Desk Setup Really Means
A clean desk is intentional, not necessarily empty. It supports the work you actually do while making unrelated objects less visible and easier to put away.
Work essentials are the tools required for your current job: perhaps a laptop, monitor, keyboard, mouse, notebook, pen, or drawing tablet. These deserve convenient positions because repeatedly retrieving them adds unnecessary effort.
Useful storage supports those essentials without crowding the working area. A designated drawer for chargers, a vertical file holder for active papers, or a small tray for daily stationery can all be useful—even if they are not perfectly hidden.
Visual clutter is different. It includes objects that have no current purpose, several versions of the same tool, old notes you no longer need, loose packaging, tangled cables, or decorations that compete for limited space. One meaningful photograph is a personal touch; six unplanned objects scattered around it may simply make the surface harder to use.
Less Competition
Why a Cleaner Desk Can Help
Objects in your field of view can compete for visual processing, particularly when several stimuli appear close together. Research into visual attention helps explain why a busy scene may demand more selective attention, but it does not prove that a spotless desk automatically makes someone productive.
A 2024 study reported by the National Eye Institute also found that the position of surrounding visual clutter changed how information moved through parts of the visual system. The experiment examined visual processing rather than home-office productivity, so the practical lesson should remain modest: reducing irrelevant items may make the immediate work area easier to scan.
A cleaner surface can also reduce task friction. If your notebook is accessible, your charger is connected, and yesterday’s dishes are gone, you can begin without completing a chain of small cleanup decisions first. That support matters, but focus will still depend on the task, your energy, interruptions, digital distractions, and other conditions.
Layout Before Storage
Start With a Functional Foundation
Do an empty-desk reset
Remove everything except equipment that is difficult or unsafe to move. Clean the exposed surface, then return items one category at a time rather than automatically recreating the old arrangement.
Sort what you removed into four groups: daily use, occasional use, belongs elsewhere, and no longer needed. Keep only the first group on the desktop. Place occasional tools in the nearest suitable drawer, shelf, cabinet, or container.
Test the stripped-back layout for a workday before buying organizers. This short trial reveals whether you genuinely need more storage or simply needed fewer items on the surface.
Create work, writing, storage, and personal zones
Arrange the desk around actions instead of matching objects. Your work zone contains the screen and input devices; the writing zone is an open area for paper; the storage zone holds active supplies; and the personal zone contains a deliberately limited number of meaningful objects.
Zones can overlap on a small desk. A keyboard that slides beneath a monitor riser can temporarily free the writing area, while a single tray can move between the work surface and a shelf. The goal is not rigid symmetry—it is knowing where an item should be before you put it down.
Set up the workstation ergonomically
Adjust your chair before arranging accessories. Sit with your back supported, shoulders relaxed, and feet flat on the floor or on a stable footrest. Keep enough open space beneath the desk to sit close to the work surface and change leg position; storing boxes or equipment there can restrict comfortable positioning.
Place the keyboard directly in front of you. Your hands should be at or slightly below elbow height, with wrists reasonably straight and upper arms close to your body. Keep the mouse beside the keyboard on the same surface so you do not repeatedly reach outward.
Position the main monitor directly in front of you at a distance where text is readable without leaning forward—an arm’s length is a useful starting estimate. The top of the viewing area is generally at or slightly below eye level, although people using bifocals or progressive lenses may prefer a lower screen.
Monitor size, vision, text scaling, and posture can change the best position, so treat measurements as starting points rather than rules. Use this ergonomic monitor setup guide when adjusting screen height, viewing distance, tilt, or a monitor arm.
Place the tools you use repeatedly—such as your phone, notebook, reference document, or pen—within a comfortable reach zone. Stand up for items that cannot be reached without leaning or twisting.
Intentional Style
Clean Desk Setup Ideas by Style
Color affects how a workspace looks, but organization determines whether it stays usable. Choose a style you can maintain without constantly polishing, rearranging, or hiding the tools you need.
White desk setup ideas
A white desk setup can feel bright and calm, but pure white across every surface may look flat or sterile. Add contrast through a warm wood shelf, tan desk mat, muted artwork, dark monitor stand, or a small plant rather than introducing many unrelated colors.
Choose matte or softly textured finishes when possible. Glossy white surfaces can show reflections and may emphasize small marks, while matte finishes usually create a quieter visual background. Lighting guidance from the University of Toronto recommends matte desk and equipment finishes where practical to reduce reflected glare.
Dark charging cables are especially visible against a pale surface. Route them along the rear edge, down one desk leg, or through an under-desk tray instead of trying to disguise every cable with matching accessories. A visible cable with a clean route often looks better than several cable covers that do not match.
Black desk setup ideas
A black desk setup can create a strong visual frame around the screen, but a room filled with dark, bulky objects may feel visually heavy. Break up large dark areas with a lighter wall, warm task light, medium-tone wood, textured fabric, or a small neutral accessory.
Dust and light-colored fibers are often easy to notice on a dark surface. Keep a reusable microfiber cloth nearby, but stored rather than displayed, and choose finishes that tolerate regular wiping. Avoid filling the desk with matching black gadgets simply because they fit the color scheme.
Good lighting matters more than adding decorative brightness. A task light can illuminate paper or detailed handwork, while positioning the desk at a right angle to a window can help limit screen glare.
Cute desk setup ideas
A cute desk setup does not require covering every open area. Begin with a limited palette of two or three related colors, then repeat those colors through stationery, a small print, a planter, or a single fabric texture.
Contain small objects so they read as one group. Pens can share a cup, memo pads can sit in one shallow tray, and collectibles can occupy a defined shelf rather than spreading across the keyboard area. Set a display limit—such as three small pieces—and rotate the rest when you want a change.
This approach also works for a cozy desk setup. Warm light, a soft neutral palette, one framed image, and a practical tray can create personality without sacrificing the clear work surface. For more layout directions, explore these broader workspace ideas for home offices.
Practical Organization
Organization That Reduces Friction
Route cables by destination
Before attaching clips or sleeves, unplug removable cables and identify where each one begins and ends. Remove obsolete leads, label connections that look alike, and group cables by route rather than forcing every wire into one oversized bundle.
Small cable clips can guide keyboard, mouse, or charging leads along the rear edge. A sleeve can combine cables traveling in the same direction, while an under-desk cable tray can hold a power strip and larger adapters off the floor. Leave power components ventilated and follow their manufacturers’ placement instructions.
Create one charging area instead of scattering chargers across the desktop. It might be a tray in a side cabinet, one corner of the desk, or a shelf close to an outlet. Keep only the cables used regularly connected.
An adjustable desk or monitor arm needs enough cable slack to travel through its full range without pulling a plug, rubbing against a sharp edge, or becoming trapped in moving hardware. Raise and lower the desk slowly while watching every connection before securing the final cable route. Additional standing-desk cable and accessory ideas can help when the workstation changes height.
Use vertical space carefully
A shallow shelf, pegboard, monitor riser, or wall-mounted rail can free desktop space without moving supplies far from the work area. Vertical storage is most helpful for lightweight items used regularly—not as a place to display everything you own.
Keep frequently handled items between seated shoulder and comfortable reach height. Store heavier objects low, use suitable wall anchors, respect the storage system’s load limit, and avoid mounting shelves where you could strike them when standing.
A monitor riser can create space beneath a screen, but height comes first. Do not raise a correctly positioned monitor merely to gain a storage slot. If the riser makes you look upward, use another storage location.
Choose storage for your work style
Good desk organization reflects what happens at the desk. A container is useful only if it makes a recurring action easier.
Remote workers
Keep a headset, notebook, and charging cable within reach. Give documents awaiting action one tray so they do not spread across the desk.
Students
Use vertical file holders or bookends for current courses. Store backup supplies separately so the main surface supports reading and writing.
Writers and researchers
Reserve one open area beside the keyboard for source material. Use a temporary “active project” folder rather than several loose paper stacks.
Designers and creators
Group tools by activity—drawing, photography, audio, or packaging—and bring out only the kit required for the current task.
A desk mat can protect the surface and visually define the keyboard-and-mouse zone, especially on a wide desk. Choose a size that leaves room for writing and does not interfere with a mouse sensor, keyboard feet, or the desk edge; this guide to choosing a leather desk mat explains the material and sizing considerations in more detail.
Make Space First
Small-Space and Low-Budget Ideas
A small desk setup needs stricter boundaries, not necessarily more organizers. Begin by repurposing what you already have: a shallow kitchen tray for stationery, a small box for adapters, a jar for pens, bookends for active files, or one designated drawer for items used less often.
Keep the center of a narrow desk for the primary task. Move storage toward the sides or onto a nearby wall, but preserve enough depth for a comfortable screen distance and enough width to keep the mouse close to the keyboard.
Do not turn the space beneath a compact desk into general storage. Clear legroom makes it easier to sit close to the work surface, support your feet, and change position. Mayo Clinic’s workstation guidance specifically recommends keeping boxes and stored objects out of the leg area.
Laptop setups
A laptop’s attached screen and keyboard make it difficult to optimize viewing height and typing height at the same time. For extended desk work, raise the screen only if you can use an external keyboard and mouse at a comfortable height; Mayo Clinic recommends this combination to make laptop use more like a desktop setup.
A sturdy stack of large books can work as a temporary laptop platform if it is stable and does not block ventilation. The separate keyboard and mouse should remain directly in front of you, not perched on the same raised platform.
L-shaped and corner desks
For an L shaped desk setup, assign each side a purpose. One side can hold the primary computer workstation while the other remains available for writing, planning, packing, or creative equipment. Avoid filling the inside corner with supplies if that prevents you from centering yourself in front of the main screen.
A corner desk setup can offer useful depth, but the corner should not force the monitor so far away that text becomes difficult to read. Move the screen forward or increase text size rather than leaning toward it. Keep the keyboard and mouse aligned with the part of the screen you use most.
In a small home office, nearby furniture can provide storage without touching the desk. A narrow bookcase, rolling drawer unit, or wall shelf may preserve more working depth than a large desktop organizer—but use an existing piece first if it already solves the problem.
Keep the System Working
Simple Desk Reset Routines
A repeatable system is more dependable than waiting until you feel motivated to clean. Make each reset small enough to complete even after a tiring day.
Five-minute end-of-day reset
- Remove cups, dishes, wrappers, and trash.
- Put loose papers into an action tray, file, recycling bin, or shred pile.
- Return pens, headphones, chargers, and notebooks to their homes.
- Close unnecessary tabs and leave tomorrow’s first task visible.
- Clear the keyboard-and-mouse area so the desk is ready to use.
Weekly desk reset
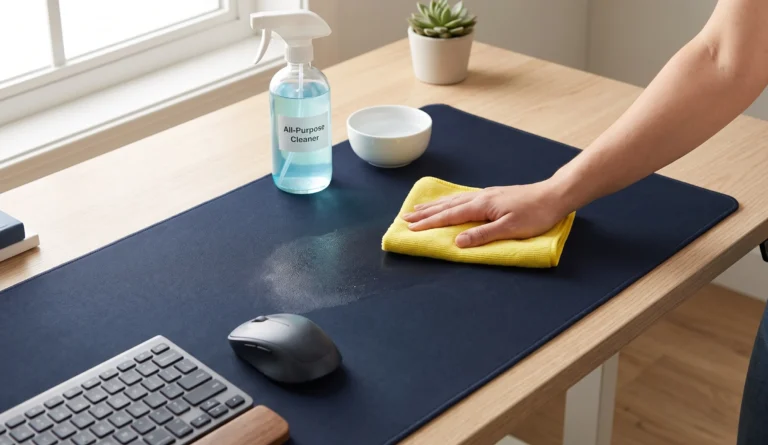
Move portable items and wipe the desk using a cleaning method suitable for its finish. Clean the keyboard, mouse, screen, lamp, and frequently touched controls according to their manufacturers’ instructions.
Process the action tray instead of merely straightening it. File what must be kept, recycle what is finished, and identify the next step for anything that remains.
Monthly equipment review
Check for unused devices, mystery cables, duplicate stationery, expired notes, and supplies that have migrated onto the desk. Return borrowed items and relocate equipment that has not supported your work during the month.
Inspect cable routes for tension and confirm that plugs, moving desk parts, monitor arms, and chair movement still have adequate clearance. Reassess the layout whenever your main task or equipment changes.
Buy With a Purpose
Optional Upgrades That Solve Real Problems
An accessory earns its place only when it removes recurring friction. If your current setup already works, skip the upgrade and preserve the space.
| Optional item | Problem it can solve | When to skip it |
|---|---|---|
| Desk mat | Protects the surface, softens contact with a hard desktop, and creates a visual boundary for the main work zone. | Skip it if it reduces writing space, traps debris, interferes with your mouse, or adds unnecessary upkeep. |
| Cable-management kit | Guides loose cables, keeps a power strip off the floor, and creates a predictable charging route. | Skip a large kit if a few reusable ties or clips can manage the cables you already have. |
| Drawer organizer or vertical file holder | Separates small supplies or keeps active papers upright and visible without spreading across the desktop. | Skip it if an existing tray, box, drawer, or bookend already contains the category effectively. |
| Task light | Adds adjustable light for paperwork, drawing, crafts, or detailed tasks without making the entire room brighter. | Skip it if existing light is comfortable, even, and free from troublesome shadows or screen glare. Task lighting should be positioned so it does not shine into your eyes or reflect on the display. |
| Monitor riser or monitor arm | Adjusts screen height, may reclaim space beneath or behind the monitor, and can make repositioning easier. | Skip it when the screen is already stable and comfortably positioned. If adjustability would solve a real issue, review the practical factors involved in selecting a monitor arm. |
Common Questions
Clean Desk Setup FAQ
How do I make my desk setup look clean?
Remove items unrelated to your current work, group visible objects by purpose, and route loose cables along deliberate paths. Give papers and small supplies specific homes, then preserve enough open surface for your main task. Consistent spacing and a limited color palette can make useful objects feel more orderly without hiding them.
What should stay on a minimalist desk?
Keep the equipment and tools you use daily: usually a computer, keyboard, mouse, task light if needed, and perhaps a notebook and pen. One or two personal touches are reasonable. Store occasional supplies nearby instead of treating minimalism as a rule that the desktop must be empty.
How can I create a cute desk setup without clutter?
Choose two or three related colors, display a small number of favorite objects, and contain stationery in a cup, tray, or drawer. Assign collectibles a defined shelf or corner and rotate the display instead of placing the whole collection on the desk.
Is a white or black desk setup easier to keep clean?
Neither color is universally easier. Dark surfaces tend to reveal light dust and fibers, while bright surfaces can emphasize dark cables, crumbs, ink, and scuffs. A durable matte finish and a simple wiping routine matter more than choosing white or black.
How often should I reset my desk?
Use a brief end-of-day reset to remove cups, return tools, and collect papers. Clean more thoroughly each week, then review cables, equipment, supplies, and unused items once a month. Increase the frequency if your work produces paper scraps, packaging, art materials, or other debris.
What is the cheapest way to organize a desk?
Start by removing what you do not use. Repurpose trays, small boxes, jars, bookends, and an existing drawer before buying anything. If a problem remains, purchase one appropriately sized organizer for that specific category rather than a matching set.